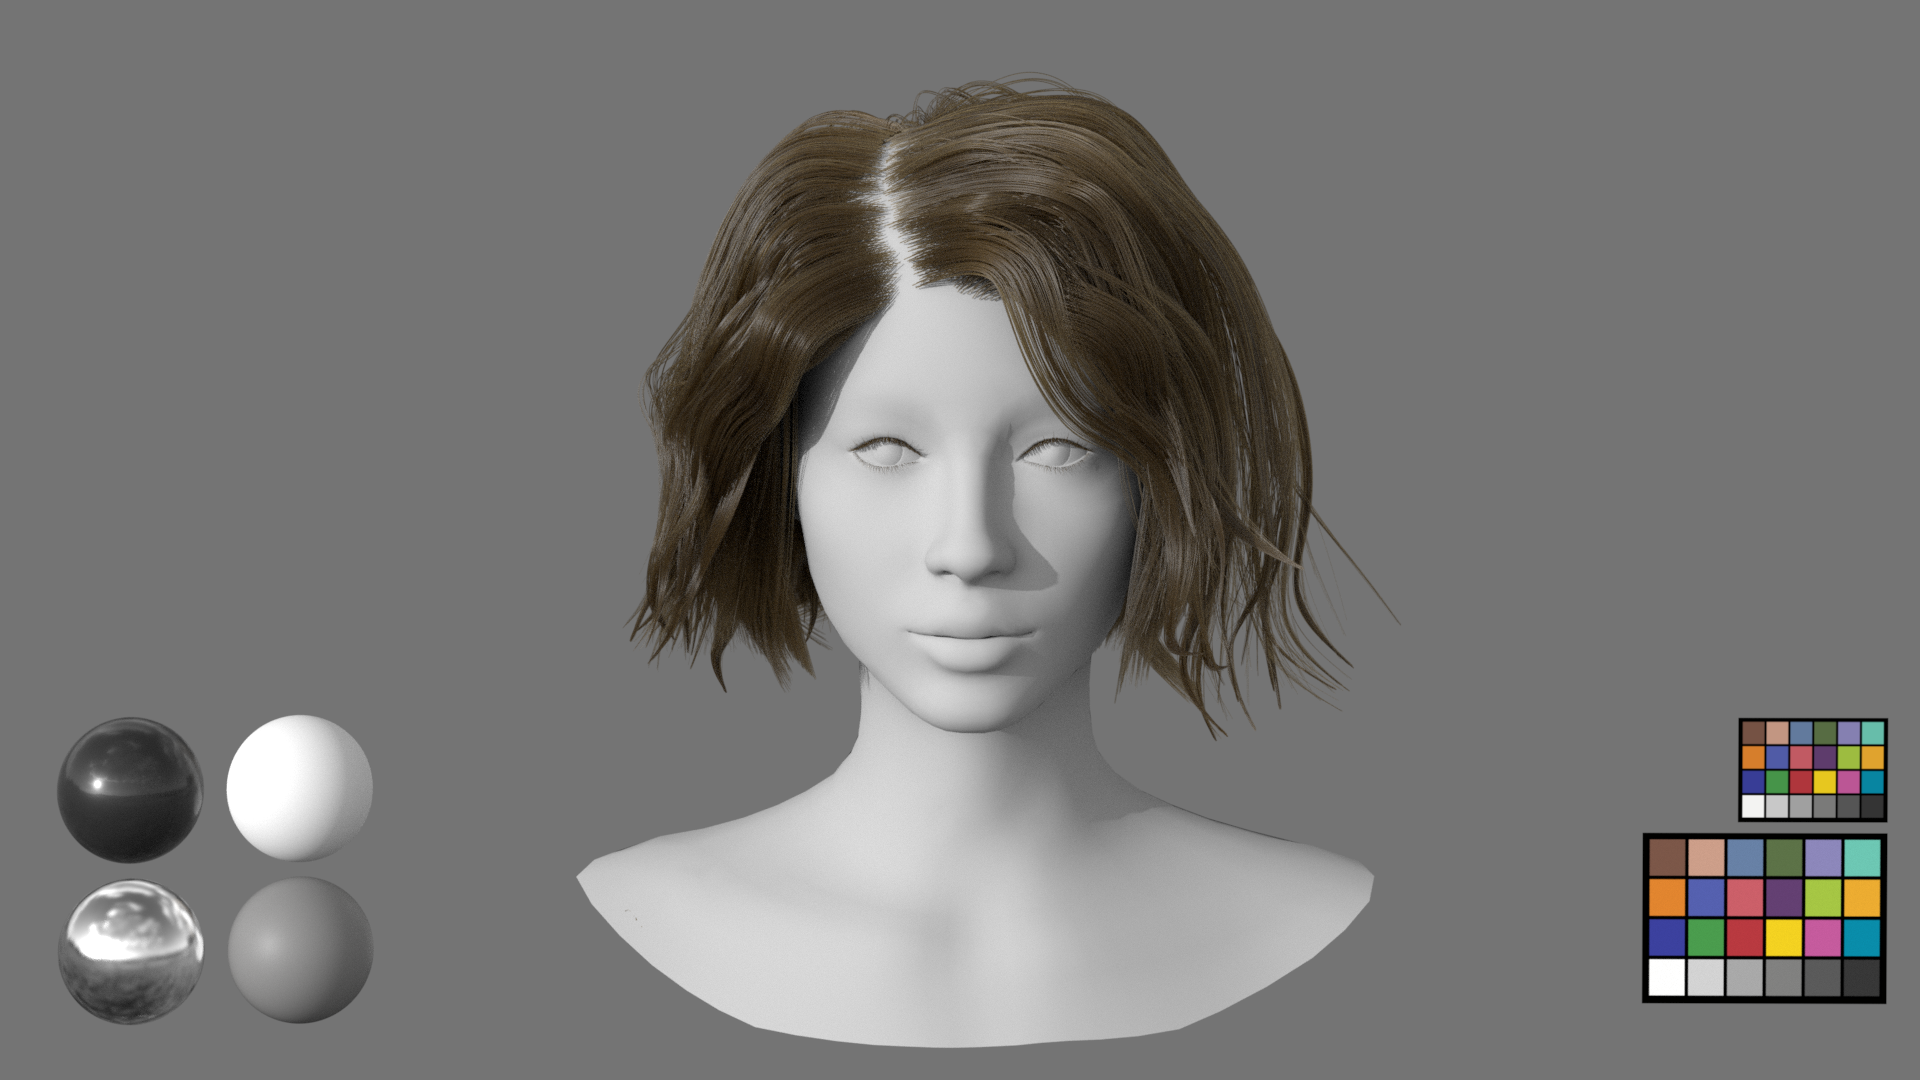
My final Capstone project involved creating a character groom. After gaining an interest in Look Development during my time as an undergraduate student at Texas A&M University, I wanted to expand my knowledge by tackling a new technical skill that utilized a program I was less familiar with.
Acknowledgements and Inspiration
Thank you to Roj Barak for providing me with the bust I used to groom. I would also like to thank my mentors, Michelle Robinson and Megan Walker, for their continued guidance and feedback on this project. Thank you as well to my professor, Caleb Kicklighter, as well as my class GAT, Kathryn King, for meeting with me every week and assisting me throughout the process. Lastly, I would like to thank Amanda Urrutia and Emma Krilowicz for their support. Each and every person involved with my project has been instrumental to my success, and I could not be more grateful.
I was inspired to create a character groom for my Capstone after seeing some peers take on the same challenge. While they did their grooms in XGen, I decided to do my groom entirely in Houdini and rendered in Renderman, a process not before taken on by a Visualization student. I am still working on it at the moment, but I look forward to sharing the final product soon!
Reference Gathering
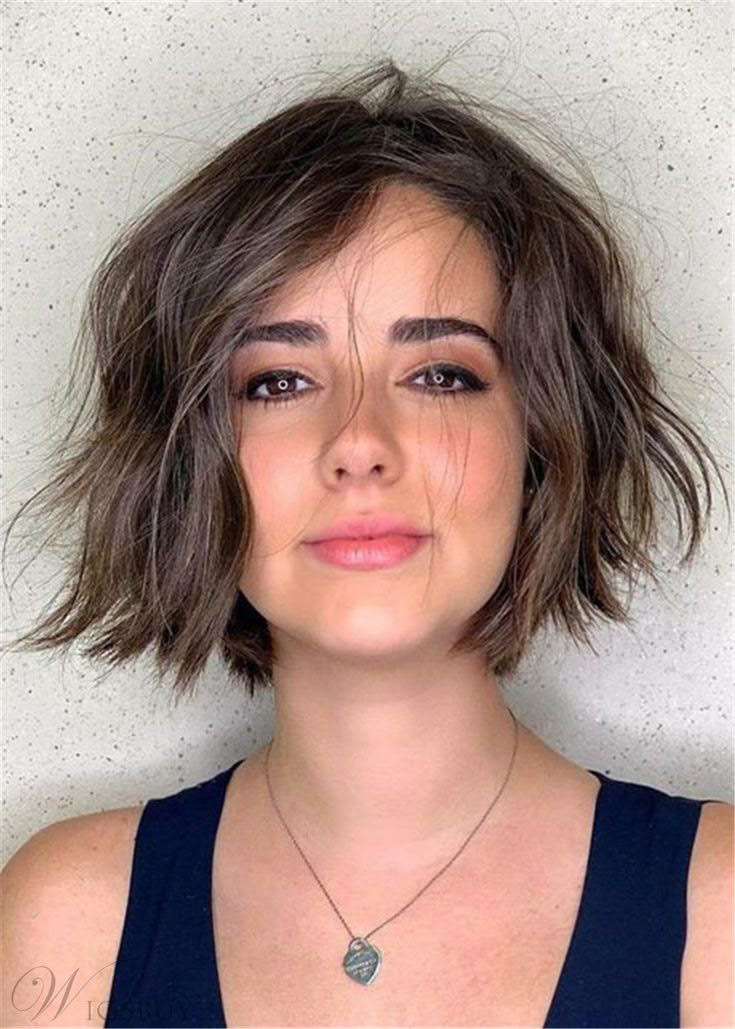
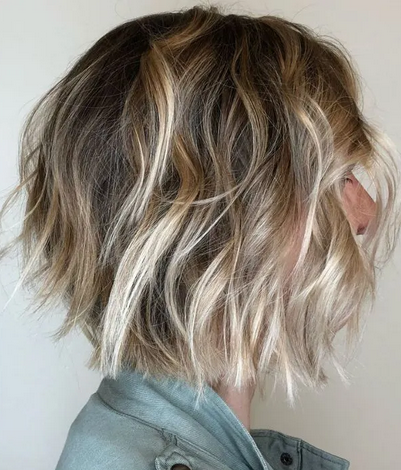
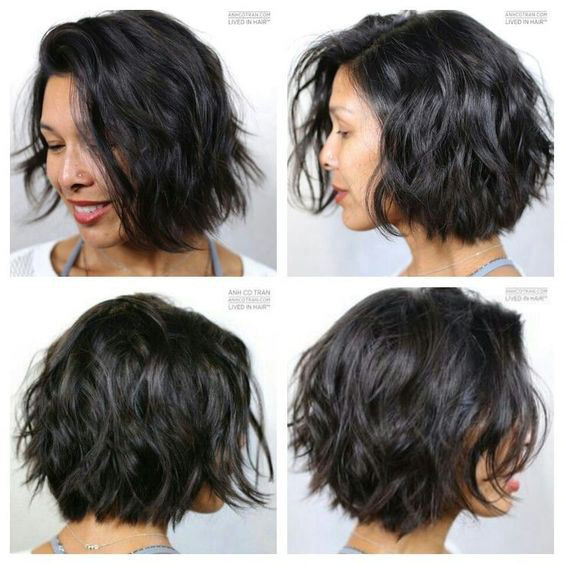
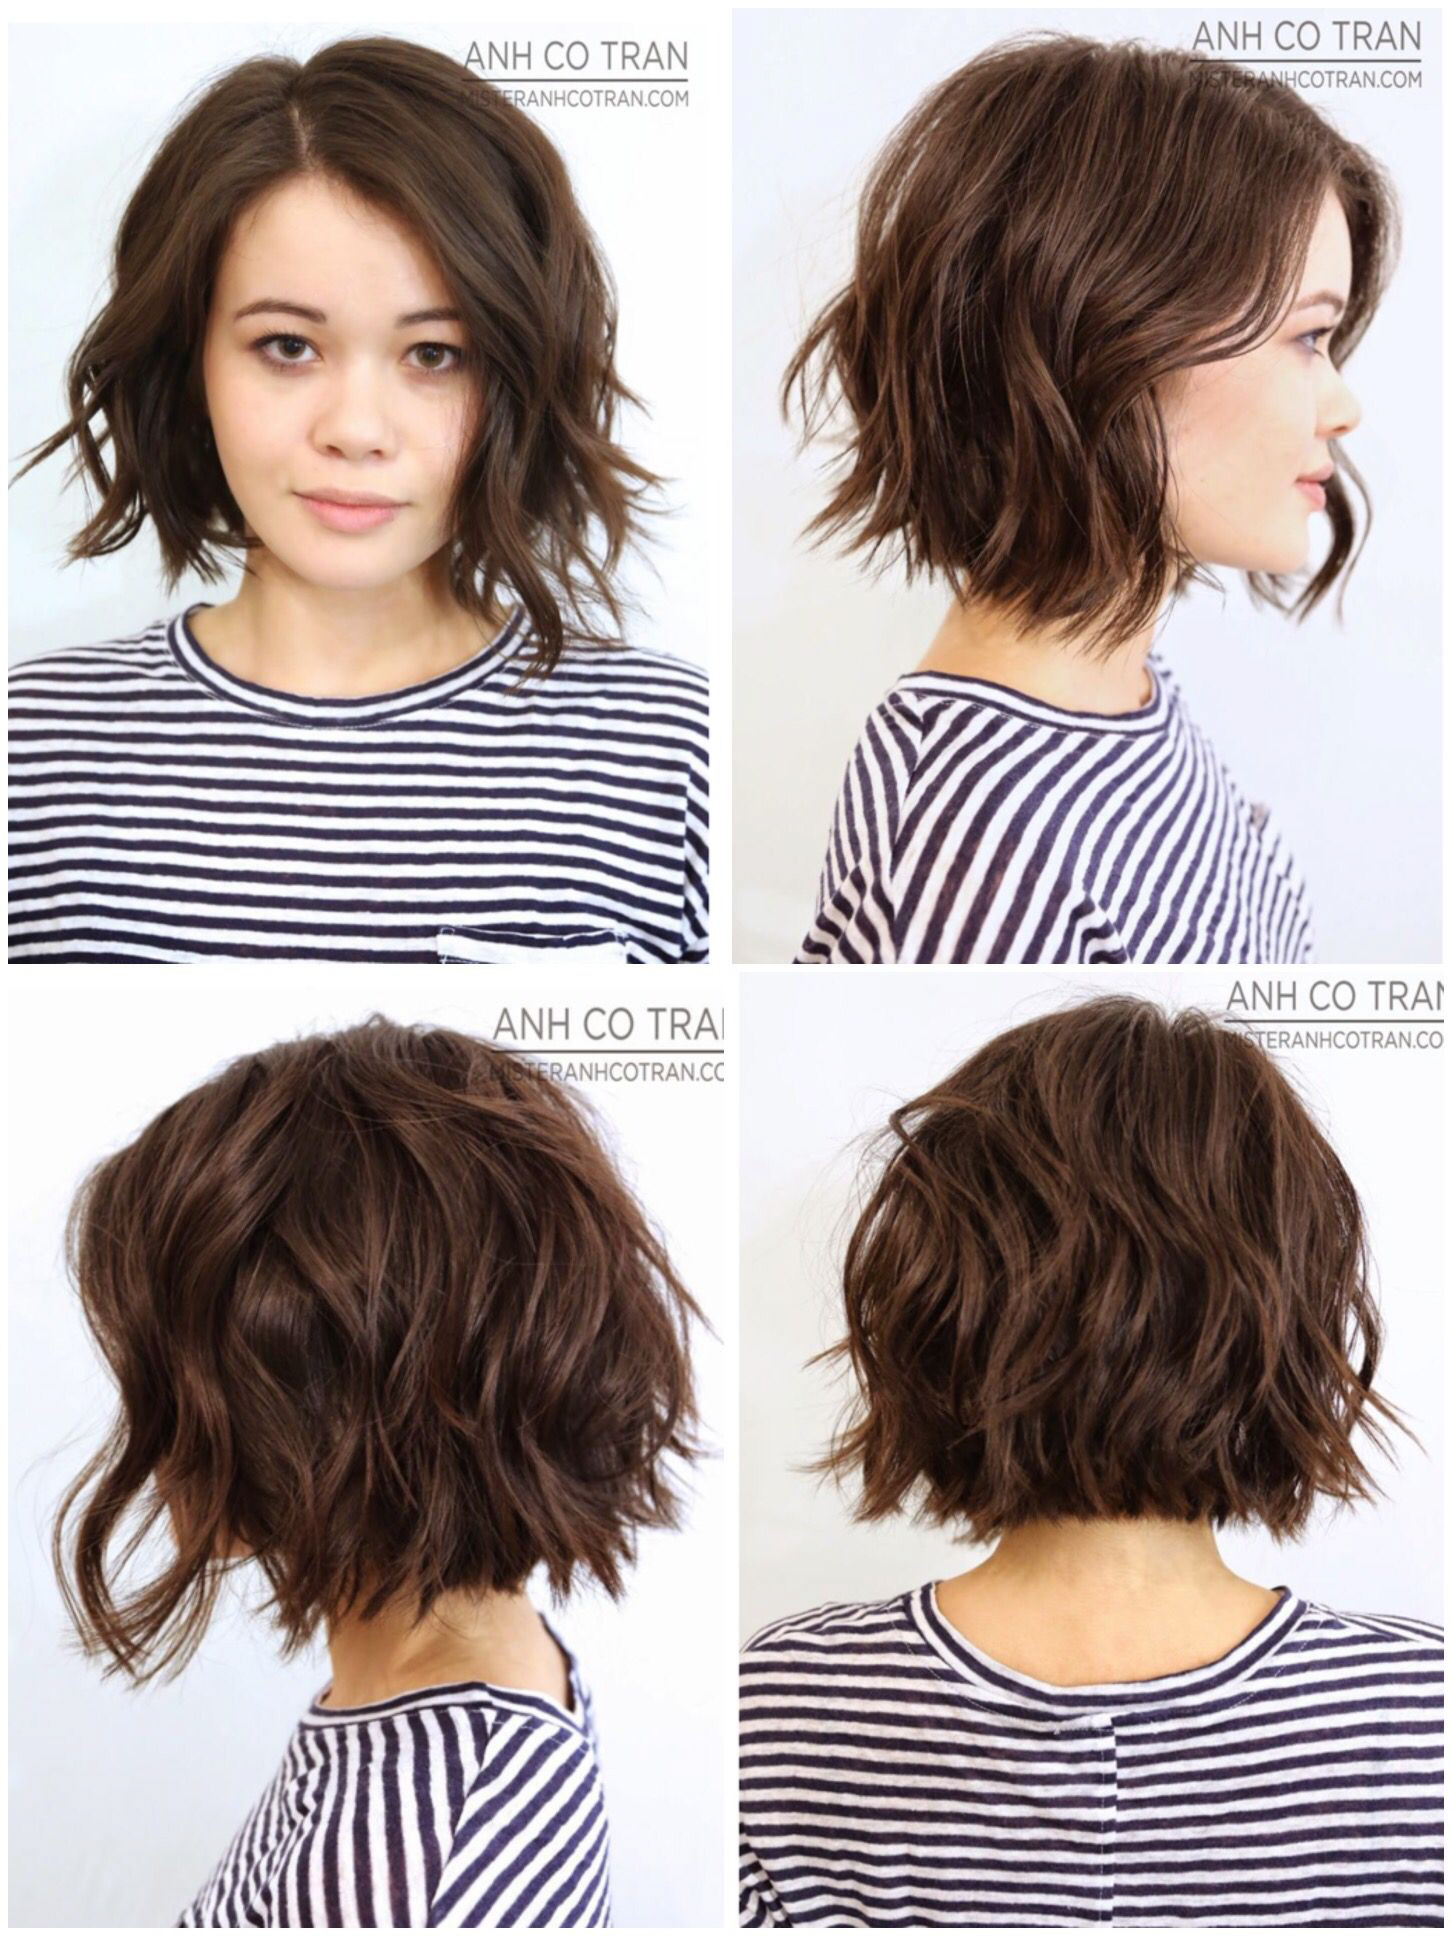
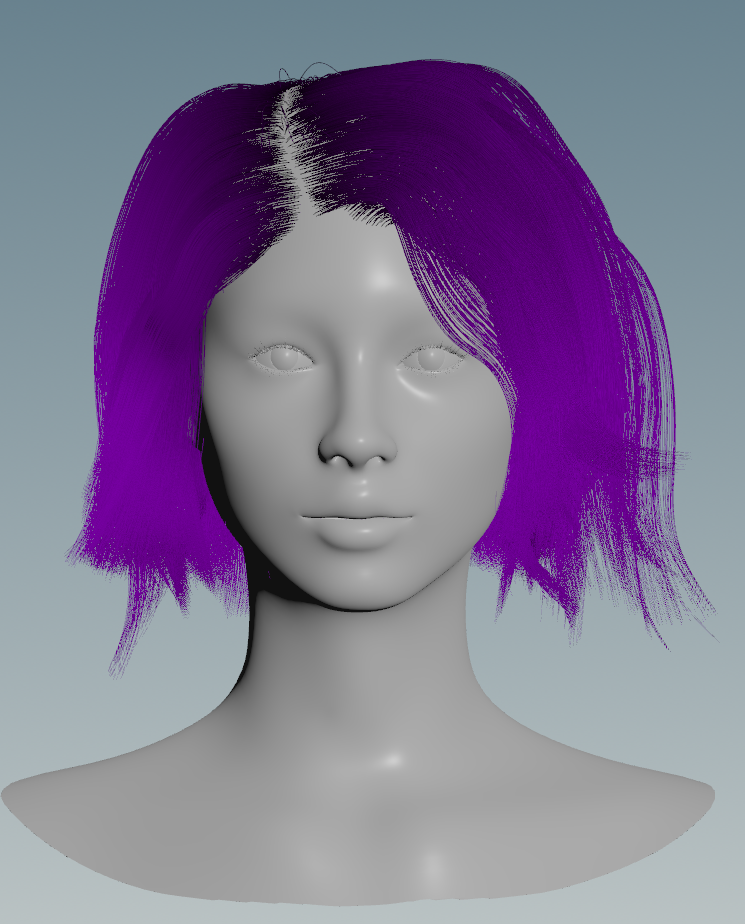
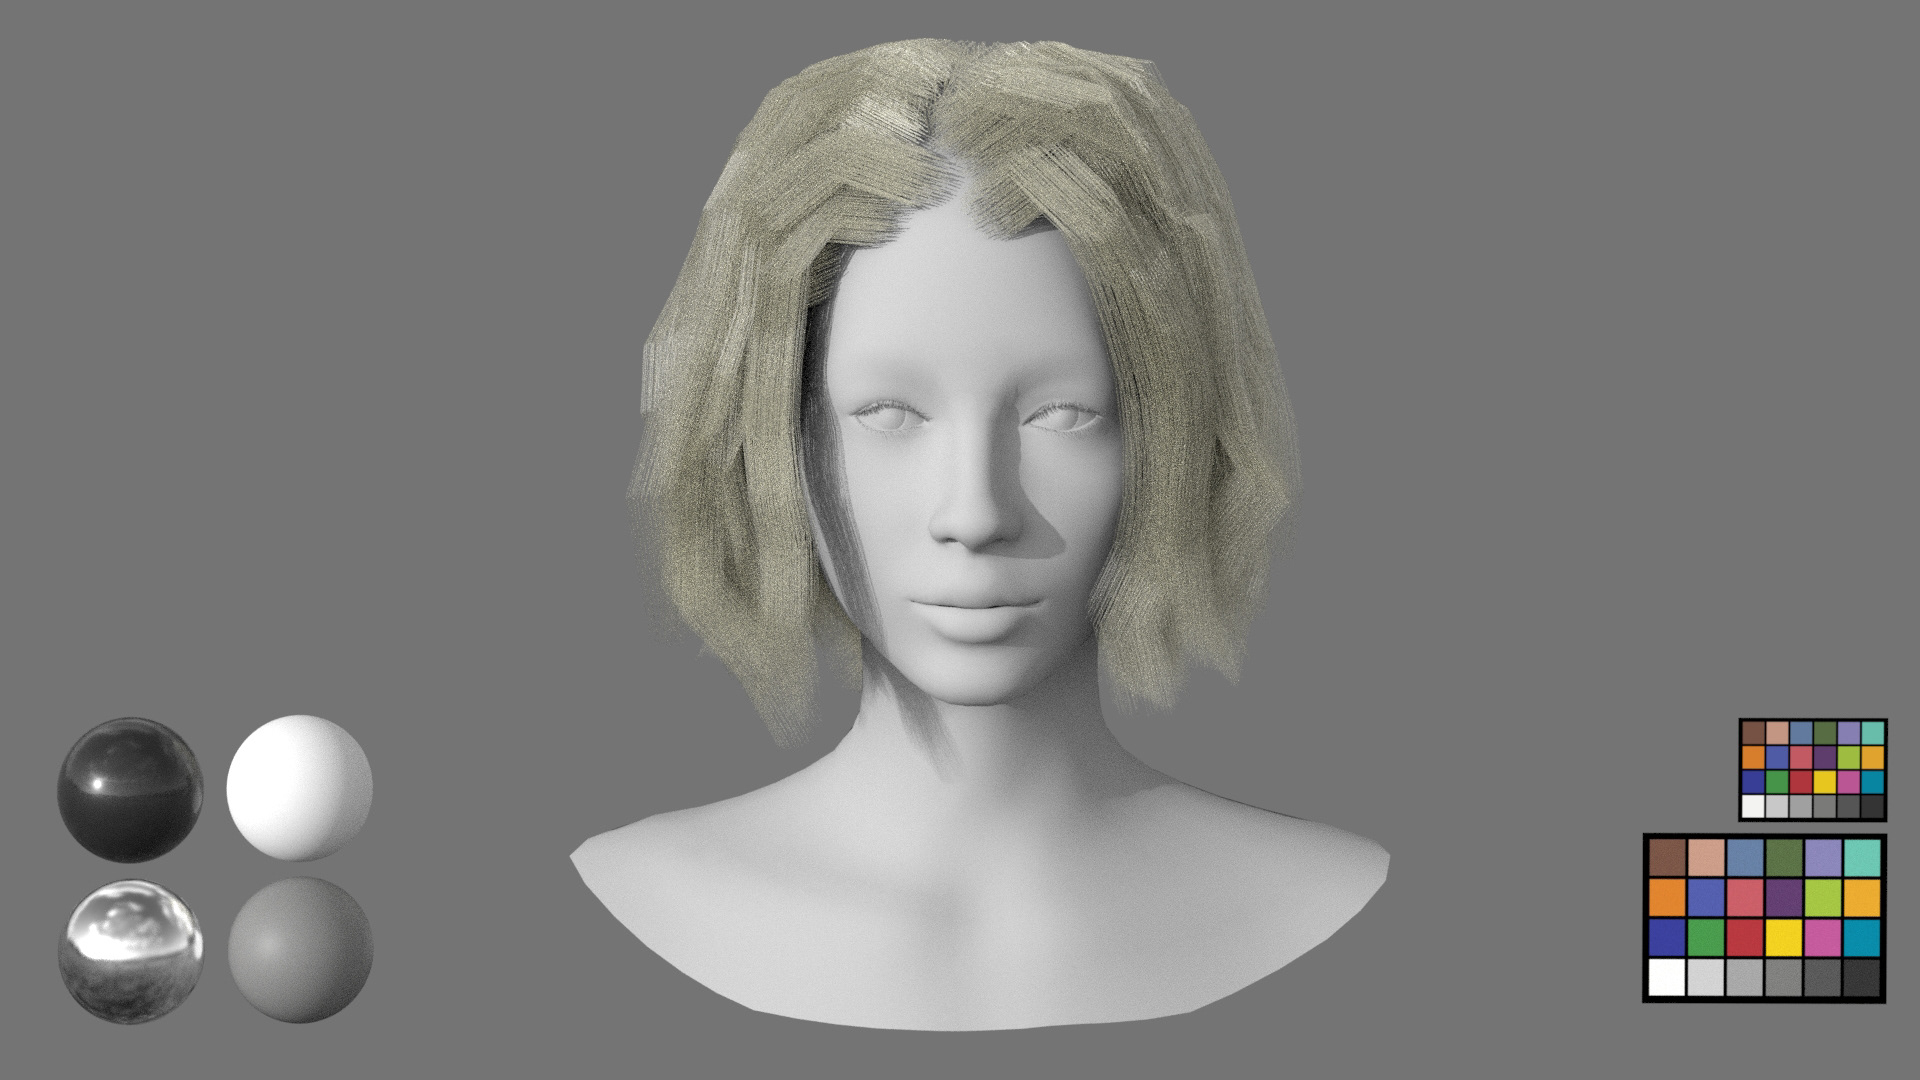
Before beginning my project, I chose a hairstyle I wanted to recreate, and proceeded to gather adequate references to assist me. Deciding on a hairstyle was surprisingly difficult. As someone completely new to the grooming process, I didn't want to choose something impossible for my first groom, but I also wanted to challenge myself technically. I finally decided on recreating a mid-length shaggy bob. Besides studying a wide variety of photos, I completed draw-overs in order to better understand the flow of such a wavy hairstyle.
Attribute Painting
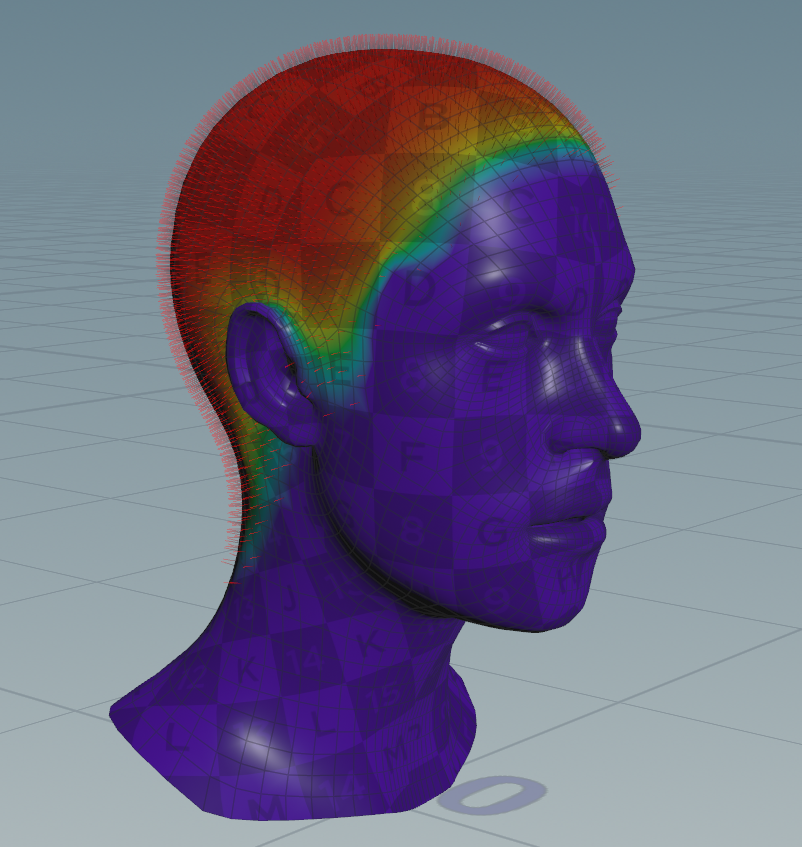
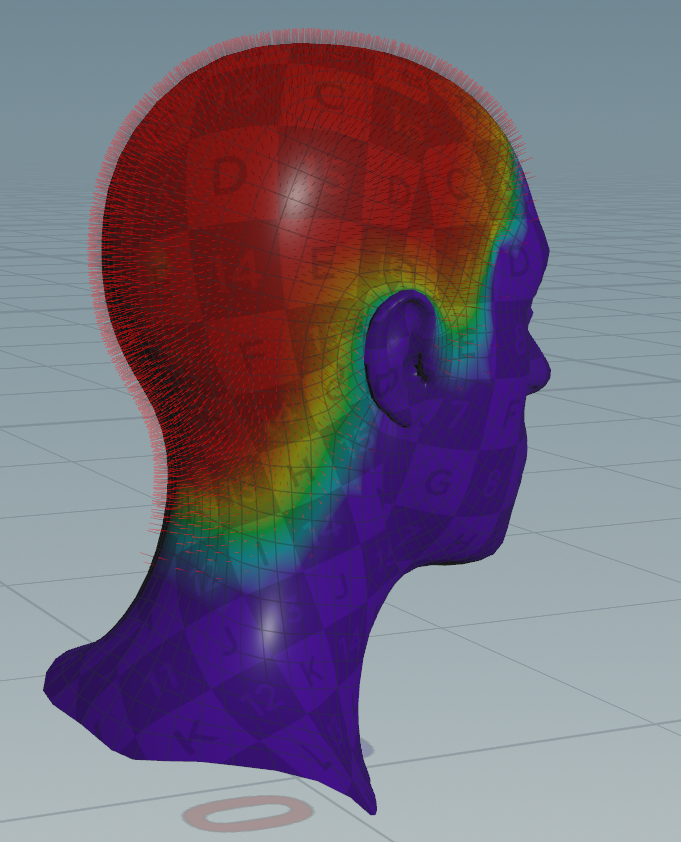
The first thing I did once my model was in Houdini was attribute paint. By using one of Houdini's attribute paint nodes, I was able to create a density mask across my model that controlled where hair would generate, as well as how dense the hair would be once generated. This breakdown on YouTube was extremely helpful for helping me understand how the node worked, as well as how to use it. Studying the shape of hair growth on a human scalp was also essential for this step.
The purple values represent where there will be no hair growth, and the red values indicate where the hair will be most dense. I used a smoothing brush in the attribute paint node to create a more realistic falloff between density values. Attribute painting is also completely non-destructive (as is most of the Houdini node-based workflow), meaning the map can be adjusted at any point down the line without having to completely redo any following steps.
Guide Creation and Refinement
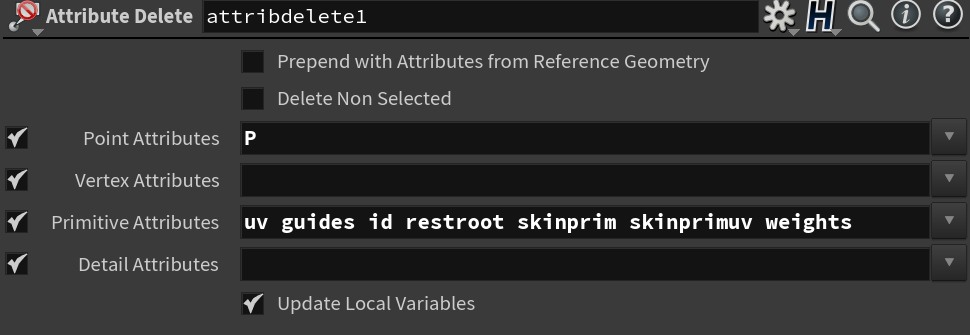
The next and most personally challenging part of the grooming process was the guides. Since the guides tell the hair where exactly to grow and interpolate, it's extremely important that they are done correctly. I ended up purchasing and downloading the grooming plug-in Groombear by Kamil Waclawiak since I didn't find Houdini 20's workflow very intuitive.
As the guides were created from scratch in Houdini, they were an ever-changing part of the process, and I am still working on refining them. I originally wanted to create them procedurally; however, I quickly learned that such a curvy hairstyle would not look great without the guides being generated from tubes or sculpted by hand. I opted to sculpt them by hand as I didn't have time to create tubes, but I will certainly generate them from tubes in the future for a more efficient workflow. I also added a few guides to the eyelashes to easily create an eyelash groom.
Towards the beginning of my process, I had hand-drawn each guide as part of one group to look generally how I wanted the hair to flow. Refining the guides this way, however, proved to be difficult. I ultimately decided to split my guides into three sections- a top layer, middle layer, and bottom layer- in order to easily isolate each part and have more control over the guides. This also gave my groom more of a full look once I generated the hair.
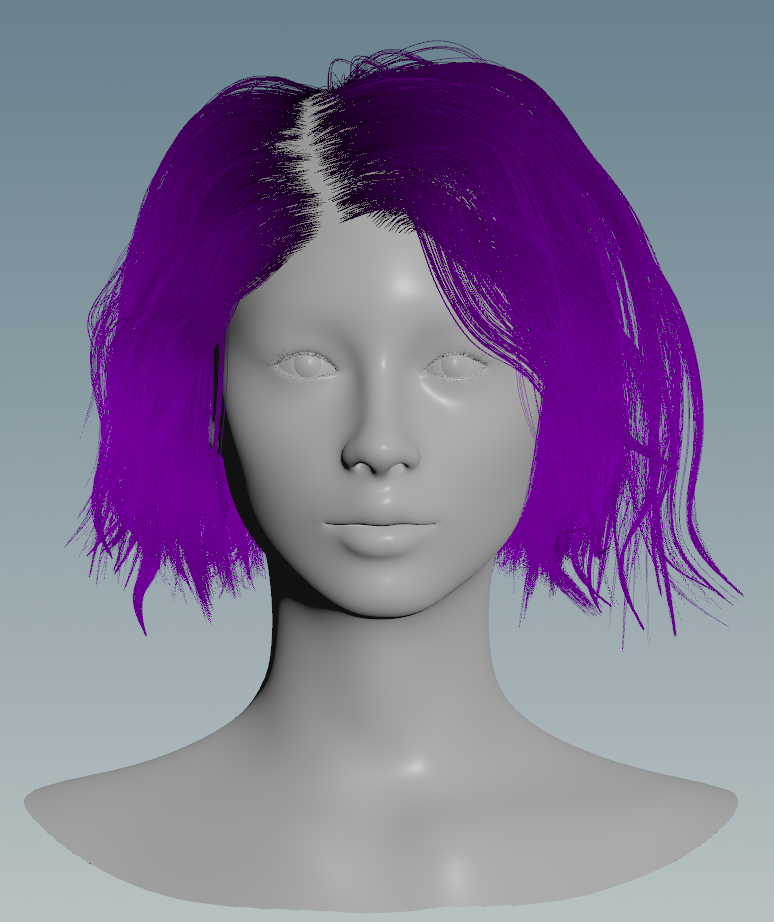
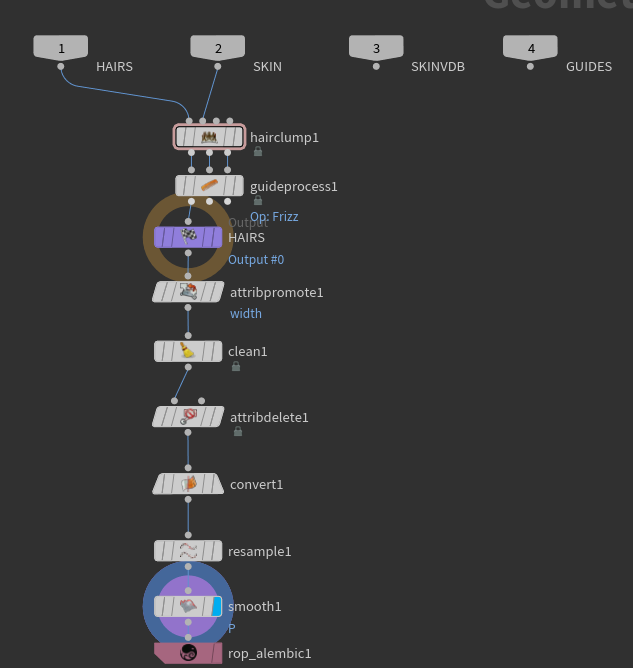
Hair Generation, Clumping, and Modifiers
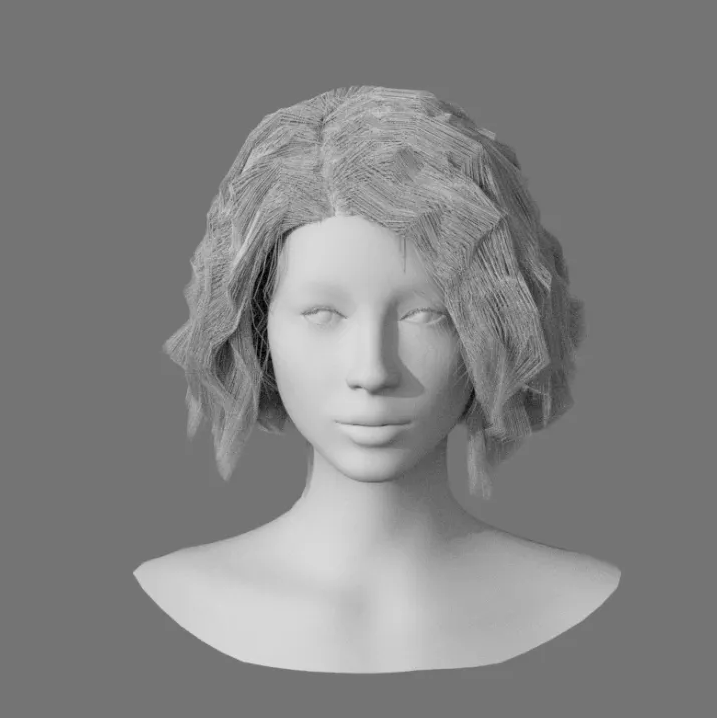
Hair generation in Houdini is fairly simple- plugging in a hairgen node- but adding modifiers and clumping is what really solidifies a hairstyle. I found this Groom Fundamentals video by Jesus Fernandez to be especially useful in understanding hair clumping. I learned that the key to getting the clumping to look better was to break it up thoroughly. The built-in node for Houdini has some fantastic options for adding varying noise and frequency, and that's what I've been working with. The fractal clumping tab was essential in allowing me to add multiple variations of smaller clumps inside the larger clumps I had originally generated.
I also added a frizz node and wave node into my hair generation in order to get closer to the shaggy look I wanted to achieve.

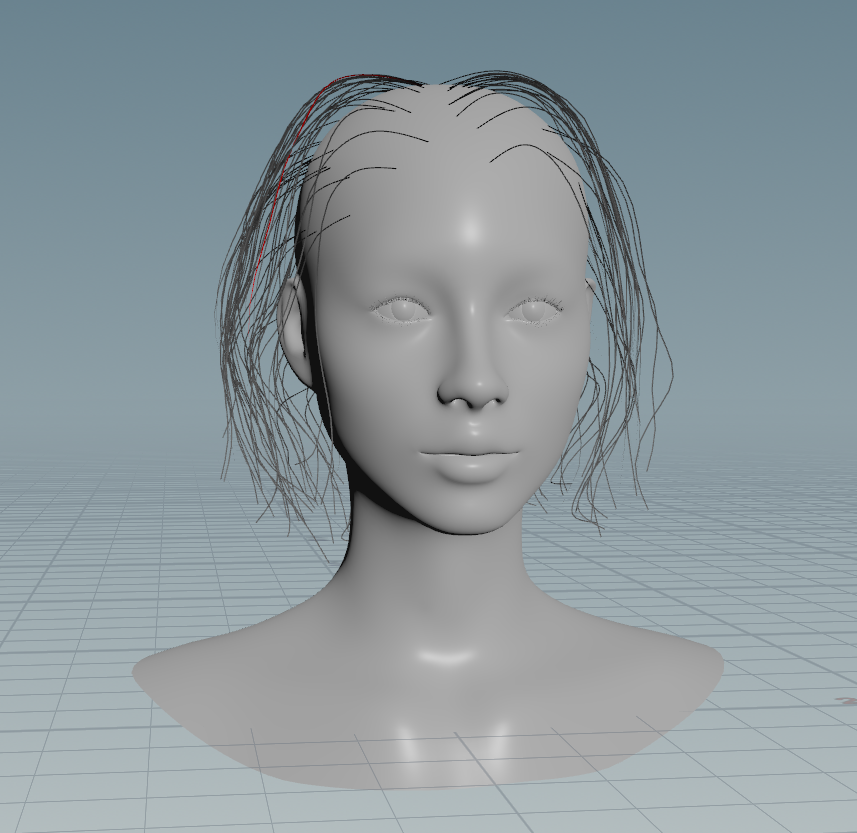
Hair prior to breaking up the clumps.
Creating the Hair Part and Technical Issues
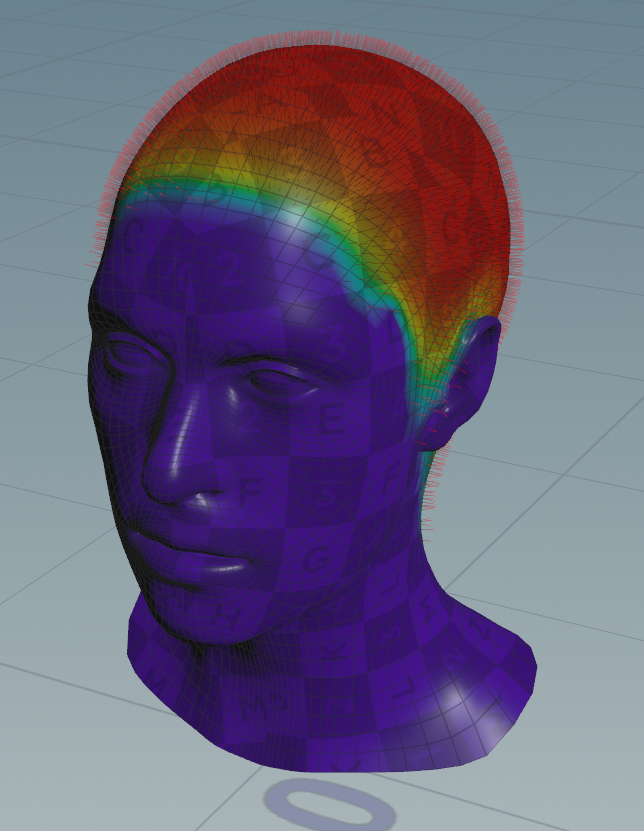
One of the biggest technical challenges I ran into during this project was creating and refining the hair part. Houdini has a guide partition node that acts similarly to XGen's region map feature, telling guides which direction to go based on where the part is drawn. However, even after using the node in my workflow, I was running into the issue where some generated hair would fall through the head instead.
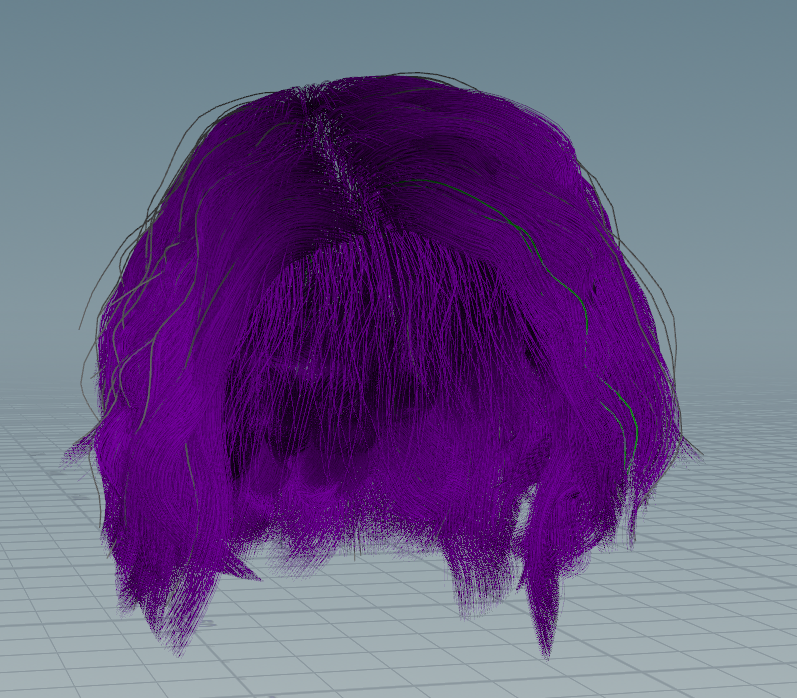
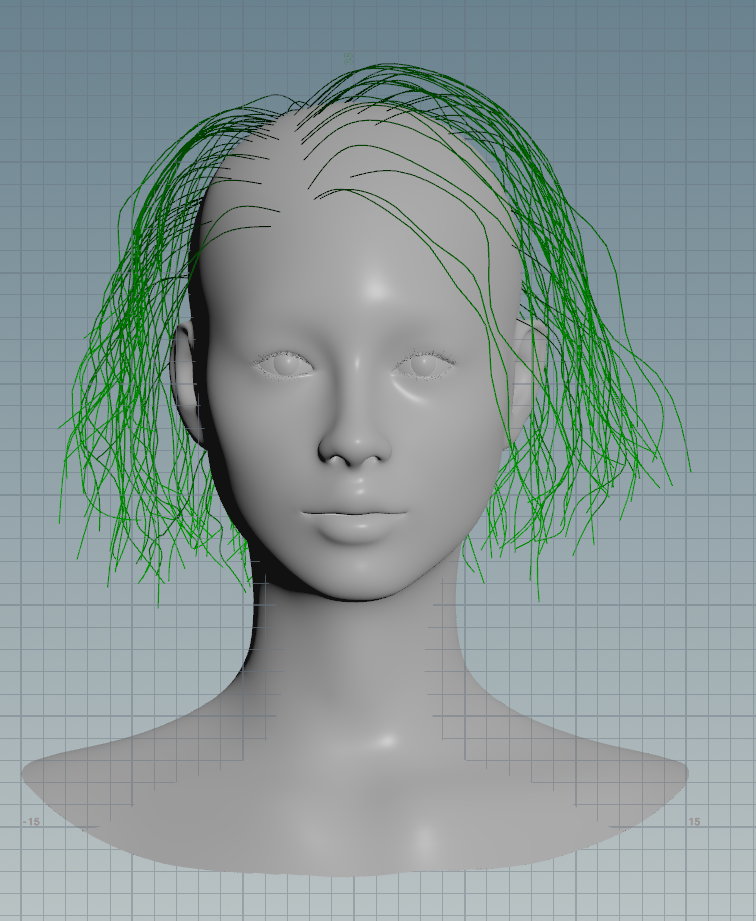
Before using a guide partition node.
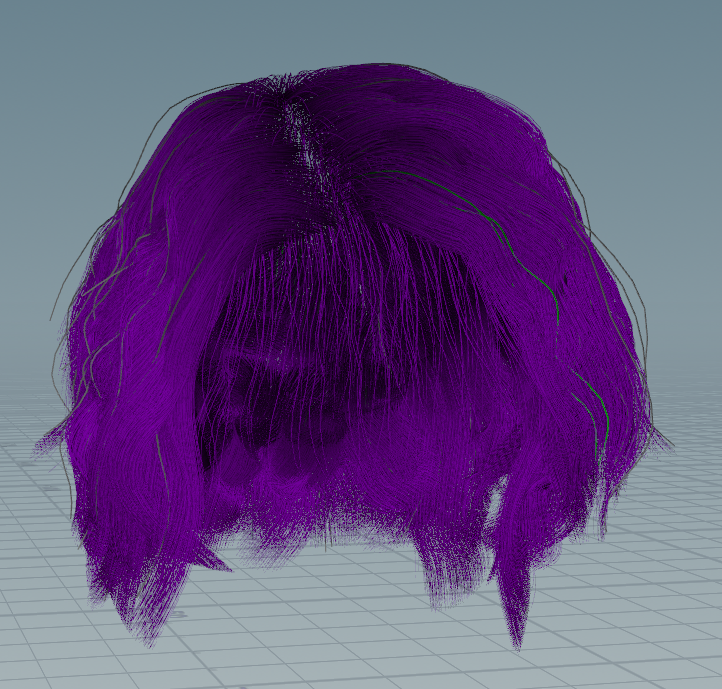
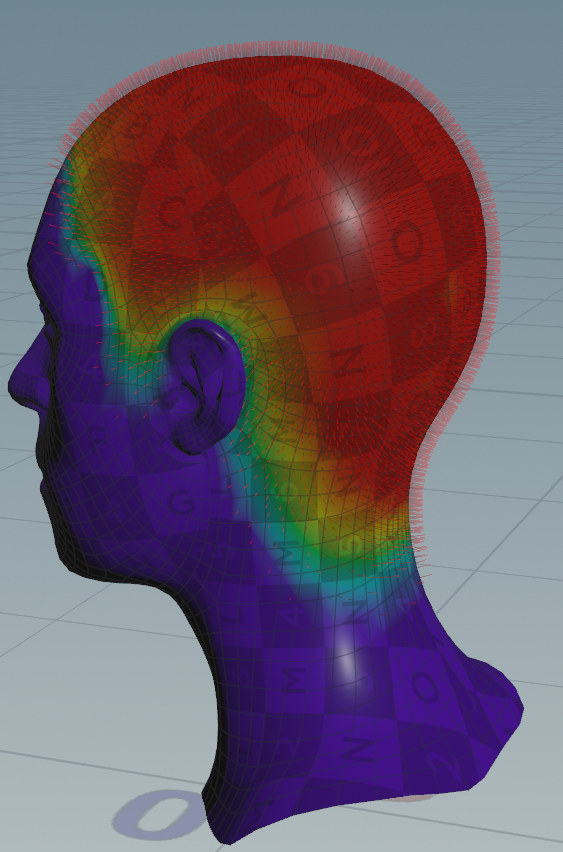
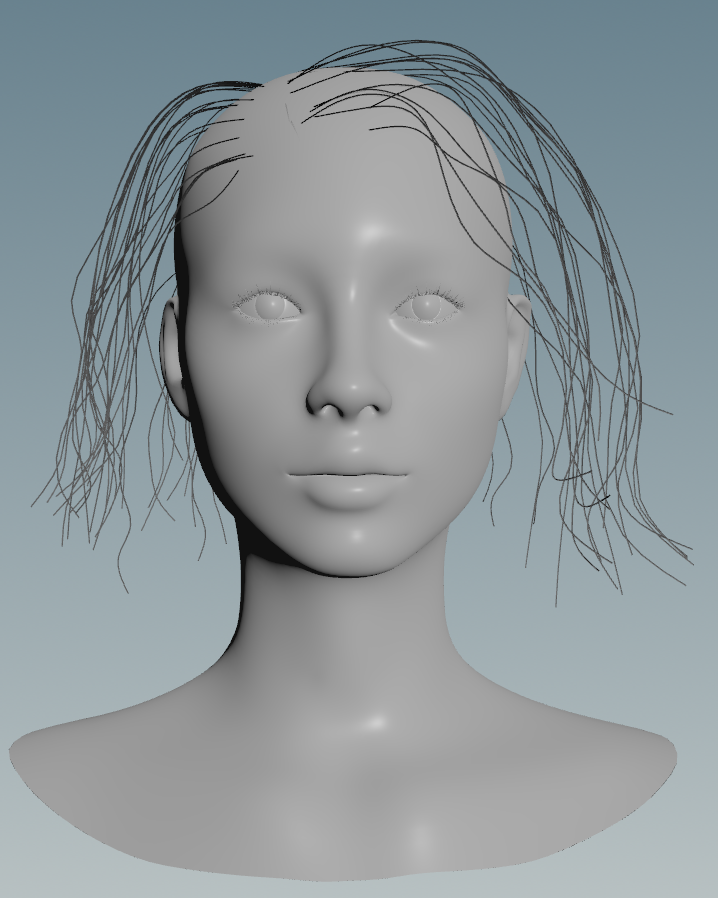
After using a guide partition node.
To resolve this issue, I adjusted the guides so that they would be further away from the parting line. The effect is more drastic than I would like and is still something I'm working on, but the generated hairs behave much more predictably.
Rendering in Renderman
Transferring my groom from Houdini to Renderman for render passes was less of a technical hurdle than I anticipated. One of my peers, Sarah Razook, made a fantastic video detailing how to import a Houdini groom into Renderman. However, I ran into a big issue with the groom itself, as it was displaying faceted in Maya.
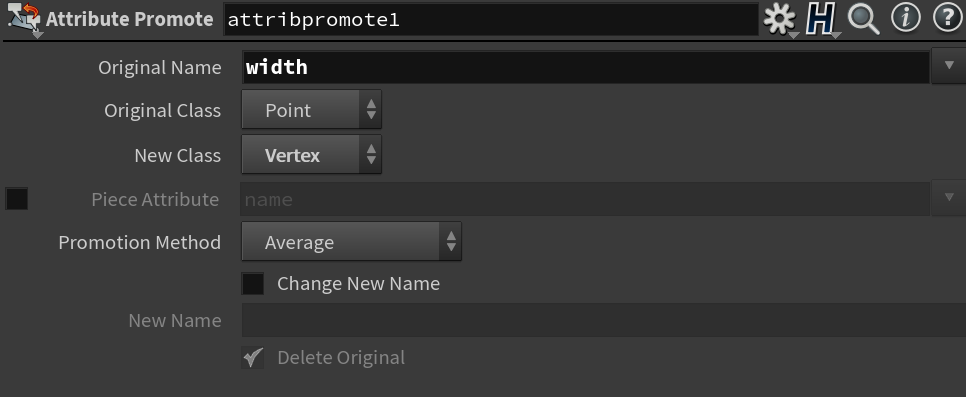
I talked to two of my peers, Amanda Urrutia and Emma Krilowicz, about overcoming this problem. After some experimentation and adjusting nodes in Houdini, the following node setup resulted in the smoother renders I was aiming for. By using an attribute promote node, I was able to convert the guides to geometry in Maya. A convert node then added divisions to the curves and ensured that there was no more faceting.
Conclusion and Future Work
This project has been an incredible opportunity for me to become more familiar with the Houdini grooming workflow. I learned how to analyze hairstyles and what makes one appealing, as well as all the technical problem-solving that goes into creating CG hair from scratch. I look forward to refining my progress on my groom, as well as applying what I've learned to future projects!